Showing posts with label hiking. Show all posts
Showing posts with label hiking. Show all posts
Monday, July 8, 2019
Testing Outdoor Tips: Can you REALLY collect DRINKING WATER from TREES?
Most of us have read in various bushcraft, hiking, and survival manuals
that you can collect water by sealing tree leaves in a plastic bag, and
letting the tree's natural transpiration process do the hard work. Is
this true? Find out in this video!

Thursday, July 4, 2019
Testing Outdoor Tips: preview
So, there's no video in this post. I'm just giving you a taste of another series of videos I'm putting together. It's called "Outdoor Tips Tested," and the name says most of what you need to know!
Testing Outdoor Tips: trying out tips, tricks, and myths from bushcraft books, survival manuals, and more! Think of it as a bushcraft Mythbusters!
If you have a tip you've always heard about, but never seen, send me an email and I'll try and test it out! badgerdoesbushcraft@gmail.com
Don't forget to subscribe to my channel!
Testing Outdoor Tips: trying out tips, tricks, and myths from bushcraft books, survival manuals, and more! Think of it as a bushcraft Mythbusters!
If you have a tip you've always heard about, but never seen, send me an email and I'll try and test it out! badgerdoesbushcraft@gmail.com
Don't forget to subscribe to my channel!
Tuesday, March 5, 2019
Day Hike: Spenceville Wildlife Area
I took a solo hike at Spenceville Wilderness Area. BCUSA Bushclass Basic outing #4. Also a bit of an experiment with setting up shots and creatively unskilled videography.
If you enjoy this video, please subscribe!
Friday, February 15, 2019
New YouTube video posted!
Harl and I had a hike at Spenceville planned for last weekend, but we got rained out. So, instead, we went down to Crowbait and built a fire, cooked some lunch, and got soaked. It was raining pretty bad. But still a good afternoon.
If you like what you see, please subscribe and share!
If you like what you see, please subscribe and share!
Sunday, February 10, 2019
YouTube channel
So I’m working on putting together a YouTube channel. It’ll be videos of outings, skills practice, gold prospecting, and all sorts of other fun stuff! Here’s a little trailer:
Sunday, January 20, 2019
DIY Billy Pot
I needed a new billy pot, as my ol' trusty coffee can finally burned itself out. I couldn't afford $40 for a Mors pot, so I went around to the local drugstores to find a tin of Piroulines or Pirouettes. I can't eat the cookies, as I have some kind of wheat intolerance, but the container would be perfect for my billy pot.
At my local CVS I found both Piroulines and Pirouettes, at $6 each. But, for only $4, I found this:

So for $2 cheaper, I got exactly what I needed, and I didn't have to waste any perfectly good (and delicious!) cookies! It's painted, and has a plastic handle, but that's easily fixed.
I started off by removing the handle and paint from the container and lid (which I forgot to take a picture of). You can do this by sanding, using some kind of chemical paint stripper, or you could toss it into your campfire and burn it off. That's what I opted for. After the paint was burned off, I washed the pot and lid and scrubbed it hard with a scrub pad. Satisfied with the cleanliness of the pot, I made a bail out of a piece of fence wire.

The little step on the bottom of the bail is to space the side of the bail away from the lid, so it can easily be removed while the pot is hanging. I punched a couple of holes in the pot with a nail, inserted the ends of the bail wire, and bent the ends in order to pin the bail in place.

After this, I made a wire handle for the lid.

The long end was inserted through the hole in the lid and bent over.

The finished pot:

And finally, in use:
At my local CVS I found both Piroulines and Pirouettes, at $6 each. But, for only $4, I found this:

So for $2 cheaper, I got exactly what I needed, and I didn't have to waste any perfectly good (and delicious!) cookies! It's painted, and has a plastic handle, but that's easily fixed.
I started off by removing the handle and paint from the container and lid (which I forgot to take a picture of). You can do this by sanding, using some kind of chemical paint stripper, or you could toss it into your campfire and burn it off. That's what I opted for. After the paint was burned off, I washed the pot and lid and scrubbed it hard with a scrub pad. Satisfied with the cleanliness of the pot, I made a bail out of a piece of fence wire.

The little step on the bottom of the bail is to space the side of the bail away from the lid, so it can easily be removed while the pot is hanging. I punched a couple of holes in the pot with a nail, inserted the ends of the bail wire, and bent the ends in order to pin the bail in place.

After this, I made a wire handle for the lid.

The long end was inserted through the hole in the lid and bent over.

The finished pot:

And finally, in use:
Sunday, December 30, 2018
Gear review: Bluefield camping tarp
PLEASE NOTE: I have not received any compensation for this review. The items reviewed were purchased by me, unless otherwise noted. At the time of publishing, any advertisements found on this post are placed by the blogging platform, and are not affiliate links. If this changes, a note will be placed in future posts, though this one may not.
So awhile back I ordered this tarp from wish.com. I set it up in a few different shelter configurations, to see how I liked it. Here's my thoughts:
INITIAL IMPRESSION:


Initally, it seems to be a decent tarp. At 57" x 98", it's a bit smaller than I would have liked, but it's a decent size for covering a hammock. Low cost as well, I paid $14 shipped, slow-boat-from-China style from wish.com. It took about 3 weeks to receive.
IN USE:
Since I bought this to be a hammock shelter, the first thing I did was string up my braided ridgeline made for Bushclass and draped it over, then set up my Yukon Outfitters hammock underneath.


This tarp only has 6 grommets: one in each corner, and one in the middle on each of the long sides. I would have liked to see a grommet in the center of the short sides as well, because in order to get proper tension on the ridgeline, I had to find small, round rocks to use as a button to tie a Prussik loop around in order to tension the tarp. Also, I prefer loops over grommets. Grommets tend to rip out easier than loops. However, the grommets are gusseted, so there is a bit of extra reinforcement there.

The grommets also have a nice, smooth inside curve to them, which should help prevent the metal grommet from cutting the guy lines.

Next, I set the tarp up as a lean-to:

This actually was part of my fire reflector bushclass, so I didn't lay out a sleeping bag or anything like that. I feel like the tarp is a bit on the small side to try to sleep under in this configuration. With the back/bottom edge down on the ground and the top/front edge at about waist level, I could not comfortably sit under the tarp. I did have enough room to lay down flat with the lean-to setup, but just barely. I would have felt more comfortable if the tarp was about a foot wider. I could raise the back edge off the ground a bit, but that would allow a draft in from behind.
After this, I tried another shelter set-up. I'm not really sure what it's called. it's like a lean-to with an awning.


This was more comfortable for sitting, especially when a little rain shower drifted through. I stayed warm and dry, even after the rain put the fire the rest of the way out. Sprocket got rained on, but that's just because he was more interested in my food than laying down under the tarp. However, because I needed to turn the tarp on its short side to get the extra length for the awning, there's no way I could lay down under the tarp in this configuration, unless I wanted to get wet from the knees down. But it's handy for sitting and watching the fire.
At 9.3 ounces, the tarp is fairly lightweight, it'll be handy for overnight and weekend backpacking trips.

PROS AND CONS:
PROS:
- At $14 shipped, it's fairly inexpensive
- Grommets are rounded inside to prevent damage to guy lines, and gusseted to avoid tear-out.
- Pretty lightweight (9.3 oz with bag)
- Good for a hammock shelter, or to sit under to keep the rain off
CONS:
- Grommets instead of loops
- Too small to comfortably sit under in a standard lean-to configuration
- Not enough tie points along the edge
BOTTOM LINE:
Overall, this is a fairly OK budged-priced tarp. It'll be handy as a hammock shelter, or as a lightweight backpacking tarp. I'm not a fan of the bright, loud colors, but that's more a personal preference than anything else, so that doesn't belong in the cons list. However, between the loud colors and the style of tie points (and lack thereof), I don't think I'd buy another one. That isn't to say that I won't use this one. I plan on using it for hammock and ground camping until the grommets rip out. Maybe it'll surprise me. It's a "good enough" tarp for under $20.
Thursday, December 27, 2018
Crowbait Creek Camp
So after our old camp was overrun by poison oak, my father in law and I decided to abandon it and scout a new place on the property he takes care of. We found a perfect flat area just above the 10 year high water line near the creek.
I give you our new camp, Crowbait!

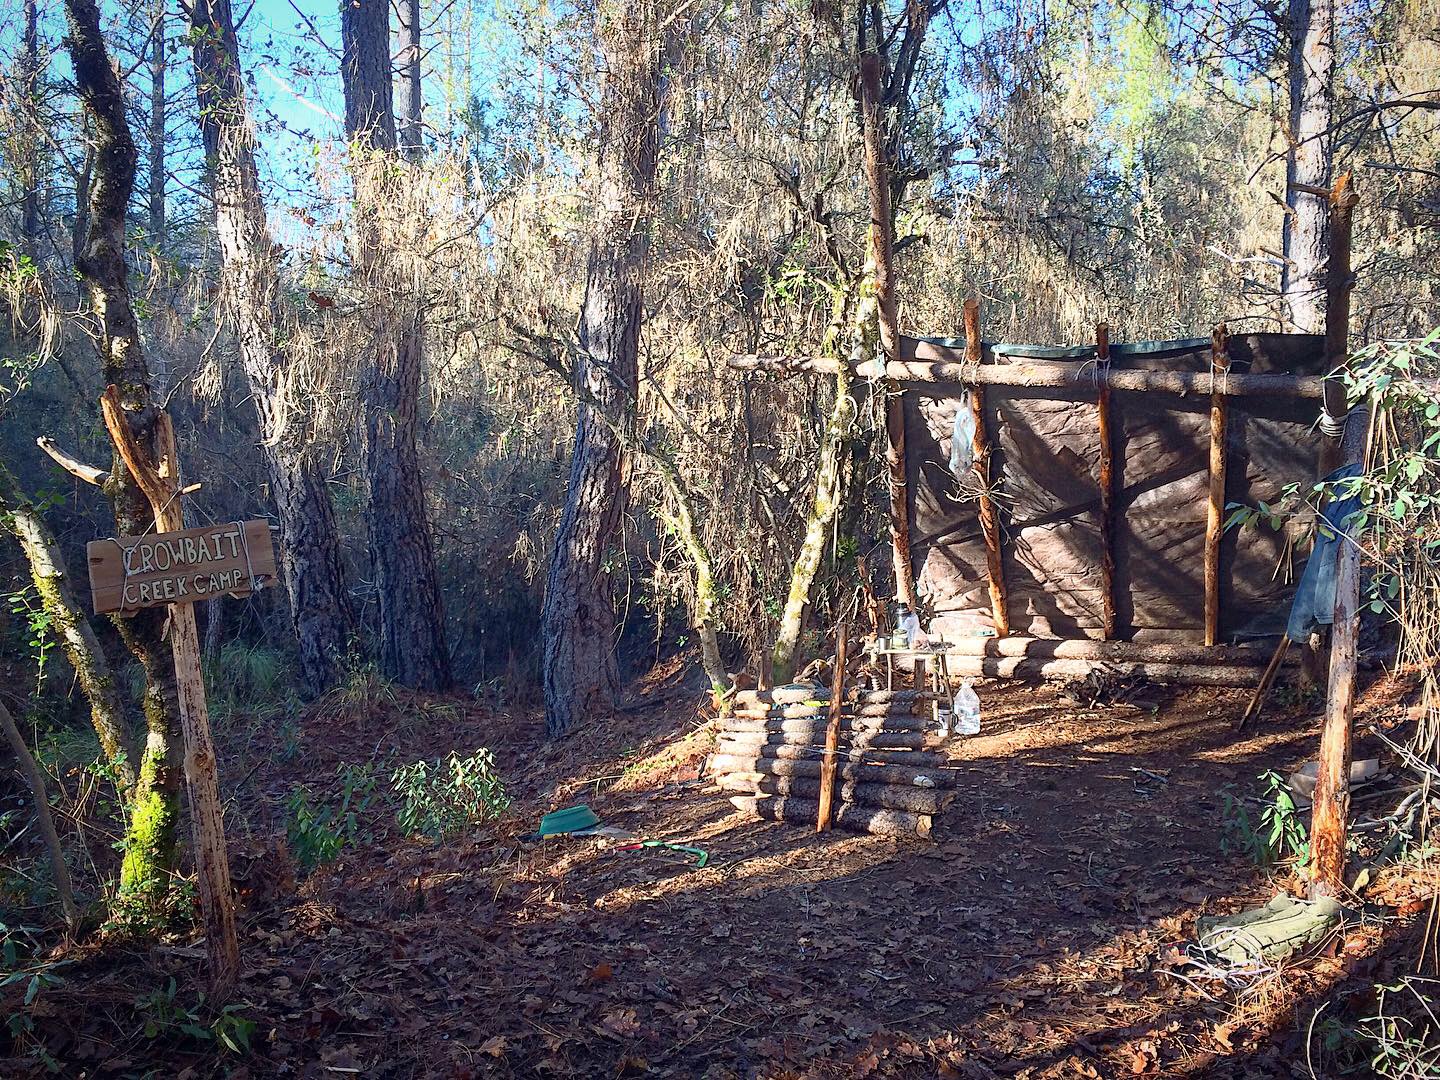
Sort of finished the shelter, but we need to put in side walls, and get a tarp that doesn’t have any holes in it.

Inaugural fire, and quick, slapped-together reflector.

Did a little panning in the creek, didn’t find anything but a couple little specks of gold. But a lot of black sand, so I’ll just need to dig a deeper hole.

Little warmup by the fire, to get feeling back into our hands.

Made a little coffee table (and remembered to put out the fire before I left)

Little peek at the creek. It’s hard to tell from the picture, but at the pine on the right the ground drops about a foot. Then it flattens out for about 15 feet toward the creek, then drops a couple more feet to the creek. The highest the creek has gotten in the last 6 years wasn’t quite to the lower flat area. And that includes the drought-busting rain California had a couple years ago. Not too worried about getting flooded out even though camp is like 20 feet from the creek.
Future plans: make a couple bush chairs so we don’t have to sit on the ground. Get a new tarp or roof the shelter with brush. Reinforce the table (it’s a little wobbly but will support a coffee cup and a billy can). Bring down some buckets with lids to store space coats and miscellaneous dry goods.
Let me know what you think!
Subscribe to:
Posts (Atom)